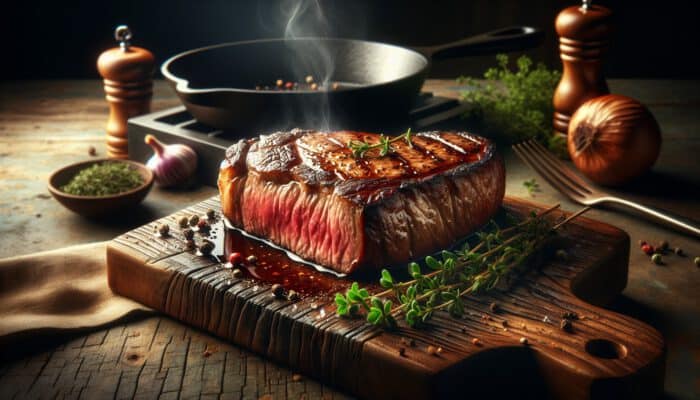
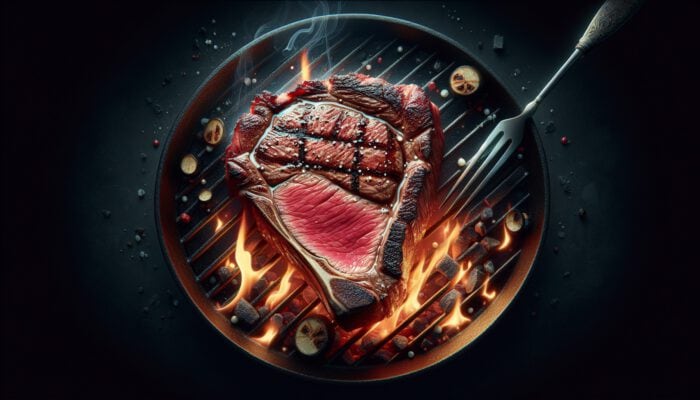
Master Reverse-Searing for Steak Perfection Every Single Time
What is the Reverse-Searing Technique and How Does It Work?
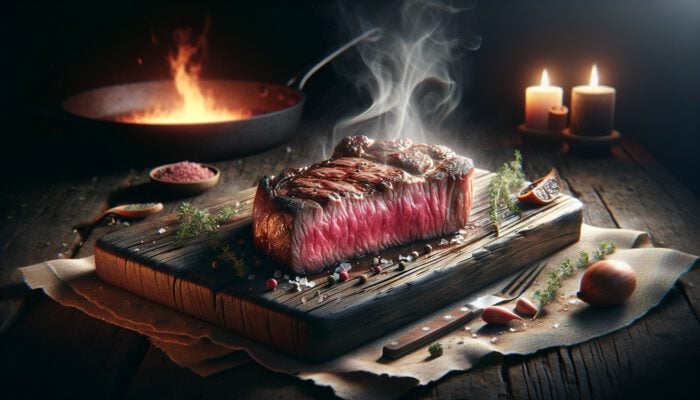
Unlocking the technique of reverse-searing revolutionises the way steak lovers prepare their favourite meal, offering a significantly improved method compared to traditional cooking. Unlike the usual approach that sears the steak first and finishes in the oven, reverse-searing starts with a careful, low-temperature cooking phase followed by a high-temperature sear. This unique process ensures even cooking throughout the steak, maintaining its natural juiciness and tenderness. The initial low-temperature stage effectively breaks down tougher proteins without compromising the meat's structure, yielding a texture enhancement highly sought after by steak connoisseurs.
To achieve the best possible results and avoid common mistakes like overcooking, adhere to these essential steps:
- Start with a thick-cut steak for the best outcomes.
- Generously season the steak with salt and pepper before cooking.
- Preheat your oven to a low temperature, ideally between 120-135°C (250-275°F).
- Carefully monitor the internal temperature with a meat thermometer.
- Once your steak reaches the desired internal temperature, remove it and allow it to rest briefly.
- Heat a skillet or grill to a high temperature for the final sear.
- Quickly sear each side of the steak for 1-3 minutes to achieve a perfect crust.
- Let the steak rest again before slicing to allow juices to redistribute evenly.
Perfecting the reverse-searing technique is vital to achieving steak excellence, ensuring you can recreate outstanding results every time you prepare this classic dish.
Essential Tools for Successful Reverse-Searing Every Time
For successful execution of the reverse-searing technique, having the right tools is crucial for home cooks. Start with a reliable oven that ensures consistent heat distribution during the low-temperature cooking phase. Investing in an oven thermometer can also prove beneficial, as temperature variations in many home ovens may impact the cooking process. A heavy-duty skillet or cast-iron pan works best for achieving the high temperatures necessary for searing, allowing you to create that desirable crispy, caramelised crust.
A high-quality meat thermometer is essential for this entire process; it should provide quick and accurate readings to help assess doneness. Use tongs to turn the steak without piercing the meat, which helps retain the juices within. Additionally, a sturdy cutting board and a sharp knife are fundamental for resting and slicing the steak in an aesthetically pleasing manner. With these indispensable tools in your kitchen, you can harness the power of reverse-searing to elevate both the flavour and texture of your steak to remarkable levels.
Key Ingredients Essential for Successful Reverse-Searing
The choice of ingredients plays a pivotal role in mastering the reverse-searing technique. Opt for high-quality steak cuts like ribeye, tenderloin, and scotch fillet for optimal results, as their marbling and fat content greatly contribute to a tender and juicy outcome. Simple seasonings such as kosher salt and freshly ground black pepper enhance the natural flavours of the steak without overpowering them.
Consider adding olive oil or butter during the searing process to enrich the flavour profile and help achieve that coveted crust. Fresh herbs like rosemary or thyme can introduce an aromatic element to your dish. Avoid overly complex marinades or sauces that may mask the steak's inherent flavour. By focusing on these fundamental ingredients, the reverse-searing method can truly shine, allowing the quality of the steak to take centre stage and resulting in a delightful meal.
How Does Reverse-Searing Enhance Steak Quality?
The Science of Effective Low-Temperature Cooking Explained
The effectiveness of reverse-searing is fundamentally rooted in the science of controlled heat application. Cooking steak at a low temperature allows for gradual breakdown of proteins, significantly reducing the chances of tough textures that are often a byproduct of high-heat cooking. Instead of searing the exterior first, low-temperature cooking promotes the relaxation of muscle fibres, resulting in a juicier and more tender steak.
As the steak warms slowly, the fat begins to render, enhancing the flavour throughout the cut. This method ensures that the steak's centre reaches the desired internal temperature without overcooking the outer layers. Additionally, maintaining an even temperature throughout the steak minimises the temperature gradient between the centre and the surface, leading to uniformly cooked, delicious steak. Understanding this process is crucial for mastering the reverse-searing technique and significantly improving your steak-cooking abilities.
Temperature Guidelines for Reverse-Searing Success
Maintaining proper temperature control is critical during the reverse-searing process to achieve a perfectly cooked steak. Begin by preheating your oven to a low temperature, generally around 120-135°C (250-275°F), which is ideal for gently warming the steak. Use a reliable meat thermometer to monitor the internal temperature vigilantly throughout the cooking process. The target internal temperature for medium-rare steak is approximately 52-54°C (125-130°F), while medium is around 60°C (140°F).
Once the steak reaches your preferred doneness, remove it from the oven and allow it to rest for a brief period. This resting phase is crucial as it permits the juices to redistribute throughout the meat, ensuring every bite remains moist and tender. Following the resting period, sear the steak over high heat to develop that sought-after crust. Adhering to these temperature guidelines during the reverse-searing process is essential for consistently satisfying results.
How Does Reverse-Searing Differ from Traditional Searing Methods?
The primary distinction between reverse-searing and traditional methods lies in the order of cooking and temperature management. Traditional searing begins with high heat, which often results in uneven cooking and the risk of overcooking the outer layers while leaving the centre underdone. This method can create a charred exterior, leading to a tough texture.
Conversely, reverse-searing minimises the chances of surface burning while maximising tenderness. By cooking the steak slowly at a controlled temperature initially, you promote even heat distribution throughout the meat. The final sear not only locks in flavours but also creates a beautifully browned crust without compromising the juicy interior. For those aiming to enhance their steak-cooking skills, adopting the reverse-searing approach can greatly elevate the overall dining experience.
Expert Strategies for Perfecting the Reverse-Searing Technique
Beginner-Friendly Step-by-Step Guidance
If you're new to the reverse-searing method, following structured guidelines can streamline your cooking experience. Start by selecting a thick-cut steak, as this technique performs best with larger cuts. Generously season the steak with salt and pepper at least 40 minutes before cooking, allowing the flavours to penetrate deeply into the meat. Preheat your oven to the designated low temperature and place the steak on a wire rack situated over a baking tray. This arrangement encourages even airflow around the steak, facilitating uniform cooking.
While the steak bakes in the oven, keep a close watch on its internal temperature with your meat thermometer. When it approaches about 5 degrees below your target doneness, remove it from the oven and allow it to rest for around 10 minutes. During this time, heat your skillet or grill until it reaches a scorching temperature. The final searing should only require 1-3 minutes per side. This brief burst of high heat creates a delightful crust while preserving the steak's moisture. Each of these steps is vital for achieving professional-level results in your everyday cooking.
Advanced Techniques for Enhanced Cooking Consistency
If you wish to refine your reverse-searing skills further, consider implementing advanced techniques that improve heat distribution during cooking. One effective strategy is to utilise a convection oven, which circulates hot air for more consistent cooking. This enhancement improves the overall texture of your steak, ensuring that each bite is tender and flavourful.
Additionally, experimenting with sous vide cooking before searing can yield exceptional results. This method involves vacuum-sealing the steak and cooking it in a precisely regulated water bath. Sous vide guarantees an evenly cooked steak and allows precise control over doneness. After sous vide cooking, sear the steak in a hot pan for a perfect crust. Both methods provide professional-level results while remaining accessible to home cooks striving for culinary excellence.
Identifying the Signs of a Perfectly Reverse-Seared Steak
To determine if your reverse-seared steak has achieved the ideal doneness, pay attention to several key indicators. First, accurately measure the internal temperature with a meat thermometer; for medium-rare, target 52-54°C (125-130°F). When you slice into the steak, it should reveal a consistent pink hue throughout, with juices running clear rather than red. The exterior should boast a beautiful brown crust that feels firm to the touch, indicating effective sealing.
Another hallmark of a perfectly cooked reverse-seared steak is its texture. A well-executed steak should be tender, providing slight resistance when pressed, signalling that it is cooked but not overdone. Finally, take note of the aroma; a rich, enticing scent should emanate from your perfectly cooked steak, indicating that flavours have developed beautifully throughout the reverse-searing process. By recognising these signs, you can ensure your steak is cooked to absolute perfection.
Expert Recommendations for Selecting and Preparing Steak Cuts
Choosing the right cut of steak is vital for optimising the reverse-searing process. Renowned cuts like ribeye, scotch fillet, and porterhouse are excellent choices due to their marbling, which enhances both flavour and tenderness. Look for steaks with ample intramuscular fat, as this fat will render during cooking, contributing to juiciness.
Proper preparation before cooking is equally essential. Trim any excess fat that may cause flare-ups during the searing phase. Season the steak with salt at least 40 minutes ahead of cooking to boost flavour. Consider adding freshly cracked pepper and herbs for an aromatic touch. By selecting the right cuts and employing effective preparation techniques, you can significantly elevate your reverse-seared steak experience.
What Are the Key Benefits of Reverse-Searing?
How Does It Enhance Steak Texture?
The reverse-searing technique greatly improves steak texture by allowing for a gradual cooking process that tenderises the meat fibres. When cooked slowly at a low temperature, the steak's connective tissues break down, resulting in a more tender bite. This method prevents the muscle fibres from seizing up, which commonly occurs with high-temperature cooking and often leads to a chewy texture.
Moreover, the final sear contributes to a delightful crust while sealing in the natural juices. This two-step cooking approach not only yields a tender interior but also creates a satisfying contrast between the crispy exterior and the succulent inside. For those who crave juicy, mouth-watering steak, reverse-searing is undoubtedly a superior method that simplifies the quest for perfect texture with every preparation.
Advantages for Enhanced Flavor Development
Reverse-searing presents significant advantages for flavour development by merging the benefits of low-temperature cooking with a final high-temperature sear. This technique ensures even cooking, locks in natural juices, and amplifies the steak's inherent flavours. The slow cooking phase allows for surface caramelisation without burning, resulting in a rich, deep flavour profile.
To further enhance flavour, consider employing the following strategies:
- Season generously with salt before cooking to draw out moisture and flavour.
- Add fresh herbs during the searing phase for aromatic depth.
- Utilise a high-smoke-point oil when searing.
- Experiment with spices or marinades prior to cooking.
- Allow the steak to rest after searing to let flavours develop.
- Pair with complementary sides to enhance the overall taste experience.
- Consider basting the steak with butter during the sear for added richness.
- Use a cast-iron skillet to optimise the searing process and flavour.
By implementing these flavour-enhancing techniques, reverse-seared steaks can shine as a standout dish that exceeds expectations.
Why Is Reverse-Searing Ideal for Thicker Cuts?
The reverse-searing technique excels with thicker cuts of steak, effectively preventing uneven doneness that often plagues traditional cooking methods. Thicker steaks require more time to cook through, and reverse-searing allows the centre to reach the desired temperature while ensuring the exterior crisps to perfection. This approach eliminates the challenge of achieving a well-cooked centre without overcooking the outer layers.
With reverse-searing, the gradual heating process enables larger cuts to cook evenly, significantly reducing the risk of a cold centre or an overly charred surface. This method not only enhances the overall dining experience but also provides a reliable way to manage various steak sizes. For home cooks, mastering reverse-searing is essential for confidently preparing perfectly cooked thick steaks every time.
Research-Backed Benefits of Reverse-Searing for Steak Excellence
Evidence-Based Reasons for Enhanced Juiciness
Numerous studies indicate that cooking steak at lower temperatures effectively retains moisture compared to traditional high-heat methods. Low-heat cooking allows the steak to warm gradually, minimising moisture loss. In contrast, traditional searing often results in significant moisture evaporation, leading to a drier steak.
Utilising the reverse-searing method ensures that the steak remains juicy and tender. The initial low-temperature cooking phase preserves the steak's juices, while the final sear enhances flavour without compromising moisture. This approach has proven to outperform traditional methods, equipping home cooks with the skills to achieve succulent steaks consistently.
Health Benefits of Reverse-Seared Steak
From a health perspective, reverse-searing can offer benefits compared to traditional cooking methods. Cooking meat at lower temperatures reduces the formation of harmful compounds often associated with high-heat techniques, such as charring. This leads to a healthier dining experience while still delivering a perfectly cooked steak.
Moreover, the reverse-searing technique helps preserve nutrients across various cuts of meat. Cooking at lower temperatures aids in retaining essential vitamins and minerals, resulting in a more nutritious meal. By adopting reverse-searing, home cooks can move towards healthier eating without sacrificing flavour or satisfaction.
Long-Term Cooking Efficiency with Reverse-Searing
Mastering the reverse-searing technique ultimately enhances cooking efficiency over time. Once you become familiar with the method, it streamlines your cooking routine, allowing you to achieve consistent, high-quality results without repeated trials. This technique also builds confidence in your culinary skills, as you can rely on a straightforward method to achieve desired outcomes.
Additionally, reverse-searing provides flexibility in timing. You can prepare other meal components while the steak cooks slowly in the oven, making for more efficient kitchen time. By refining your routine with reverse-searing, you can expect more satisfying results and a more enjoyable cooking experience.
Why Is Reverse-Searing Crucial for Achieving Steak Perfection?
What Makes Reverse-Searing Ideal for Home Kitchens?
Reverse-searing is exceptionally well-suited for home kitchens due to its simplicity and minimal equipment requirements. This method enables anyone, regardless of skill level, to achieve professional-quality finishes at home. With just an oven, a skillet, and a few essential tools, you can master the art of steak cooking without extensive culinary training.
By focusing on fundamental controls, such as temperature monitoring, you can maintain precision throughout the cooking process. This accessibility empowers home cooks to elevate their steak preparation skills and produce restaurant-quality results. The straightforward nature of reverse-searing makes it a preferred technique for anyone aiming to impress with perfectly cooked steak.
Common Challenges and Effective Solutions in Reverse-Searing
While reverse-searing offers numerous benefits, home cooks may encounter certain challenges. One common issue is achieving even heat distribution, which can vary depending on the oven's performance. To mitigate this, rotate the steak halfway through cooking or invest in a quality convection oven that circulates hot air for consistent results.
Another challenge may arise during the searing phase. If the skillet is excessively hot, it can lead to over-searing, resulting in a burnt crust while leaving the interior underdone. To avoid this, maintain a moderate temperature and closely monitor the searing time. By understanding these challenges and implementing effective solutions, you can ensure flawless execution of the reverse-searing process every time you cook.
Comparing Reverse-Searing Results with Other Cooking Methods
In terms of outcomes, reverse-searing consistently yields superior texture and flavour compared to traditional cooking methods. The controlled low-temperature cooking ensures the meat remains tender and juicy, while the final sear provides an attractive, flavourful crust. This two-step process creates a harmonious balance that is often difficult to achieve through other methods.
Conversely, traditional searing can produce steaks that are unevenly cooked, frequently resulting in dry exteriors and undercooked interiors. Home cooks seeking perfection will find that reverse-searing offers a more reliable and accessible cooking strategy. The enhanced texture and flavour make it a preferred option for anyone serious about steak preparation.
Preparing Your Steak for the Reverse-Searing Process
Initial Seasoning Techniques to Boost Flavour
Properly seasoning your steak is vital for enhancing its flavour before cooking. Start by applying a generous amount of kosher salt at least 40 minutes prior to cooking. The salt draws out moisture while enhancing flavour penetration, resulting in a well-seasoned steak. Following the salting, consider adding freshly ground black pepper to introduce an extra layer of taste.
For those aiming to further elevate their steak, consider incorporating dry rubs or marinades that complement the steak’s natural flavours without overwhelming them. However, keep the seasoning straightforward to allow the meat's quality to shine through. By focusing on effective initial seasoning techniques, you can lay a solid foundation for achieving that tender, juicy finish during reverse-searing.
How to Select the Optimal Cut of Steak for Maximum Results?
Choosing the right cut of steak is fundamental to optimising the reverse-searing process. Look for thick cuts that can withstand gradual heat application, such as ribeye, filet mignon, or T-bone steaks. These cuts are often marbled with fat, which adds flavour and moisture to the steak as it cooks.
When selecting steak, consider these criteria:
- Marbling: Seek intramuscular fat for enhanced flavour and tenderness.
- Thickness: Opt for steaks that are at least 2.5cm thick for the best results.
- Freshness: Choose bright red, fresh cuts with no off-odours.
- Choice of Cut: Ribeye and tenderloin are ideal for reverse-searing due to their tenderness.
- Quality Rating: Higher grade cuts (e.g., Prime) will yield better results.
- Buy from Reputable Sources: Ensure a reliable butcher or supplier for quality assurance.
- Consider Age: Dry-aged steaks can offer a richer flavour profile.
- Budget: Select cuts that fit within your budget while still providing quality.
By adhering to these criteria, you can confidently select steak cuts that yield a flawless reverse-sear.
Pre-Cooking Preparation Tips for Optimal Results
Proper pre-cooking preparation is crucial for achieving the best results with reverse-searing. Start by allowing the steak to rest at room temperature for about 30-40 minutes before cooking. This step helps ensure more even cooking and prevents a drastic temperature difference between the exterior and interior.
Be sure to pat the steak dry with paper towels before seasoning; this enhances the searing process by reducing surface moisture. Avoid common pitfalls, such as starting with a cold steak, which can lead to uneven cooking. Thoughtful preparation of the steak before commencing the reverse-sear process lays the groundwork for a flawless outcome, ensuring a tender, juicy steak ready for the searing phase.
Monitoring the Internal Temperature of Your Steak Accurately
Accurate monitoring of the steak's internal temperature is pivotal during the reverse-searing process. To achieve your desired doneness, utilise a reliable meat thermometer to track the internal temperature consistently throughout cooking. Insert the thermometer into the thickest part of the steak, avoiding bone or fat to ensure the most precise reading.
As a general guideline, aim for the following temperatures:
- Rare: 50°C (120°F)
- Medium Rare: 52-54°C (125-130°F)
- Medium: 60°C (140°F)
- Medium Well: 65-67°C (150-155°F)
- Well Done: 70°C (160°F and above)
Once the steak reaches approximately 5 degrees below the target temperature, remove it from the oven and allow it to rest before searing. Accurately monitoring the internal temperature is essential for achieving the desired doneness without risking overcooking, ensuring a perfectly tender and flavourful result every time.
Achieving the Ideal Sear for Your Steak
Final Searing Process Explained for Maximum Flavour Development
The final searing process is a critical aspect of the reverse-searing technique, responsible for creating that iconic crust. After removing the steak from the oven, allow it to rest briefly to redistribute the juices. Meanwhile, preheat your skillet or grill to a high temperature—ideally 200-230°C (400-450°F)—to ensure a quick, effective sear.
Using a small amount of oil with a high smoke point can help achieve a beautiful brown crust. Place the steak in the hot pan and sear for 1-3 minutes on each side, turning only once. This short duration is sufficient to develop a rich, caramelised surface while preserving the interior's perfect cooking. The searing process intensifies flavours, creating an irresistible aroma that elevates your steak to exceptional levels.
Resting and Serving Suggestions for an Unforgettable Meal
After searing the steak to perfection, resting it is crucial to allow the juices to settle and redistribute throughout the meat. Rest the steak for about 5-10 minutes on a cutting board, loosely covered with foil to retain warmth. This step is essential for maintaining moisture and ensuring a tender bite when you finally slice into it.
When serving, consider slicing the steak against the grain for optimal tenderness. Pair your perfectly reverse-seared steak with complementary sides such as roasted vegetables, mashed potatoes, or a fresh salad. Drizzling a light sauce or a herb-infused butter over the top can further enhance the flavour profile, creating a dish that is not only delicious but also visually appealing. These resting and serving suggestions complete the reverse-searing process, ensuring a delightful dining experience.
Troubleshooting Common Issues Encountered in the Reverse-Searing Process
During reverse-searing, you may encounter a few common issues that can affect the final result. One frequent problem is over-searing, which can lead to a burnt crust or an overcooked interior. If you notice this happening, reduce the searing time and closely monitor the skillet's temperature to achieve a perfect golden-brown finish.
Another challenge could be uneven cooking, which may occur if the steak is not uniform in thickness. To address this, consider using a meat mallet to tenderise thicker sections or choose cuts that are more consistent in thickness. Ensuring even heat distribution is essential, so rotating the steak during the cooking phase can rectify this issue.
Lastly, if your steak lacks seasoning or flavour after cooking, consider incorporating more robust seasoning techniques in the future, such as brining or marinating before reverse-searing. By identifying common issues and applying effective solutions, you can refine your reverse-searing technique to achieve consistently perfect results.
Frequently Asked Questions About Reverse-Searing
What is reverse-searing, and how does it work?
Reverse-searing is a cooking method that first cooks the steak slowly at a low temperature, then sears it quickly at high heat to develop a crust, resulting in an evenly cooked, juicy steak.
Which cuts of steak are best suited for reverse-searing?
Thick cuts such as ribeye, tenderloin, and porterhouse are ideal for reverse-searing due to their marbling and fat content, which enhance tenderness and flavour.
How can I determine when my steak is done cooking?
Utilise a meat thermometer to check the internal temperature; aim for 52-54°C (125-130°F) for medium-rare. The steak should display a uniformly pink centre and possess a firm crust.
Is it possible to use a grill instead of an oven for reverse-searing?
Yes, a grill can effectively be used for reverse-searing. Cook the steak over indirect heat initially and then sear it quickly over direct heat to achieve the desired crust.
How long should I allow my steak to rest after cooking?
Rest your steak for 5-10 minutes after cooking to allow the juices to redistribute, ensuring a juicy, tender bite when sliced.
Is it necessary to season the steak before reverse-searing?
Yes, seasoning is crucial. Applying salt well in advance enhances flavour and helps retain moisture throughout the cooking process.
What advantages does reverse-searing offer compared to traditional methods?
Reverse-searing provides improved moisture retention, even cooking, and a superior crust, making it ideal for achieving restaurant-quality results at home.
Can I utilise sous vide for reverse-searing?
Absolutely! Sous vide allows precise temperature control, ensuring the steak is evenly cooked before the final sear and enhancing the reverse-searing process.
What type of pan is best for searing steak?
A heavy-duty skillet or cast-iron pan is ideal for searing, as it can withstand high temperatures and distribute heat evenly for a perfect crust.
How can I prevent over-searing my steak?
To avoid over-searing, carefully monitor the skillet's temperature and limit the searing time to 1-3 minutes per side, depending on the steak's thickness.
Connect with us on Facebook!
The post How to Reverse-Sear a Steak for Perfection: For Beginners appeared first on https://cookinggods.com
The Article Reverse-Searing a Steak: A Beginner’s Perfect Guide Was Found On https://limitsofstrategy.com